|
SIDE DECKS Three infill sections of 4mm ply sheet are needed around the cabin area (F8 and F9).
Cut and fit rectangles on each side of the cabin area to create side decks, filling the gap between F8 and F9 out to the gunwales.
Cut and fit a rectangle of 4mm ply sheet between F7 and F8, with a semicircle to accommodate the boiler later. Allow for a 1mm edging strip in this area.
Cut and fit a small piece of 4mm ply to the top of F9. This will support the hatch and hatch sides later. Add a central rib between F8 and F9 to support the cabin roof.
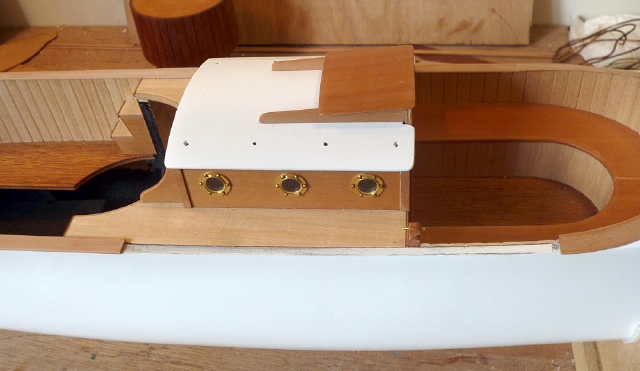
Veneer the front of the cabin with pear veneer. Make the curved brackets from 2mm pear sheet and glue them in place. Cut and fit pear veneer between them.
Plank each side deck with 6x1mm lime strip. Add 3x1mm pear trim strips at each end and in the semicircle to finish.
|
 |
|
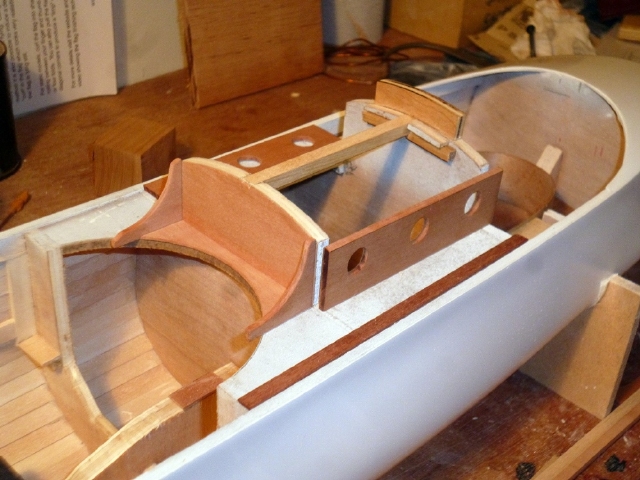
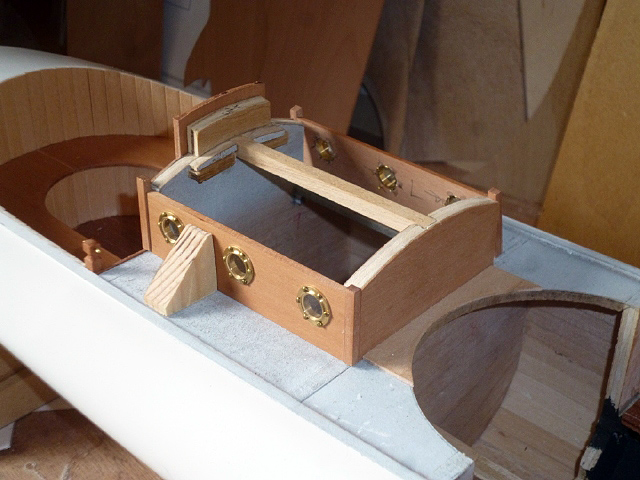
CABIN The cabin sides are 2mm pear sheet. Cut to size, allowing space at each end for the corner posts.
Make three holes in each cabin side for the portholes, glue the portholes in place and then glue the cabin sides in place between F8 and F9. Cut and fit a 4x4mm pear strip vertically to each corner of the cabin.
Notch the top centres of F8 and F9 and add a strip of wood to support the cabin roof. Make a small arc of 4mm ply sheet to fit behind the top of the door; this will locate the hatch sides and roof later. As always, check the plan, make sure you understand how the parts fit together and allow the correct amount for their thicknesses.
|
 |
|
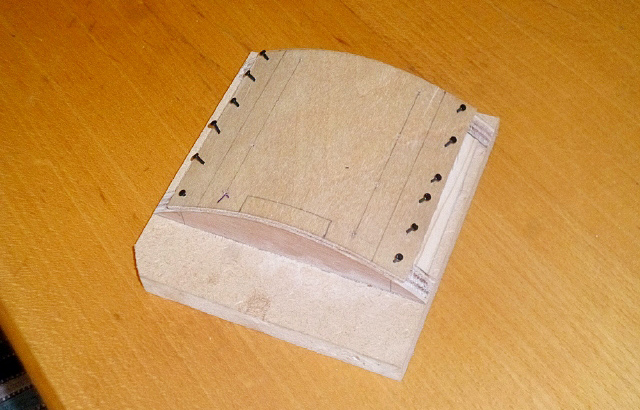
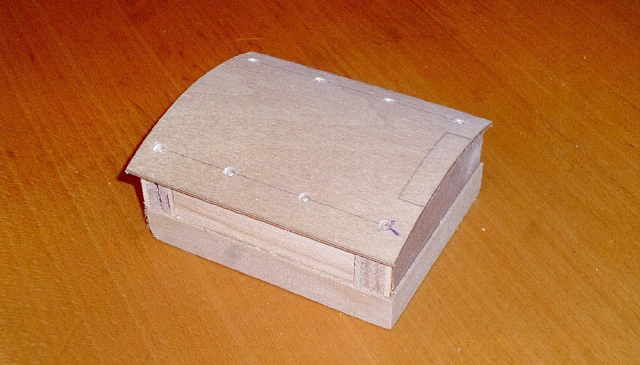
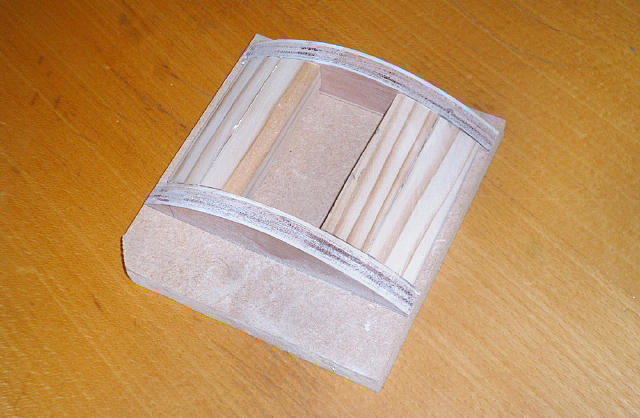
The
cabin roof is made from 2mm ply sheet. It's much easier to make it on the bench
using a dummy cabin to create and hold the curve.
Cut the ply about 10mm too wide on each side, then use steam to create the curve and nail it in position on the former. When dry, remove the nails, trim the roof to the correct width and sand smooth. Make a rectangular cut-out to fit round the top section of F9. Mark and drill the holes for the handrail stanchions.
|
|
|
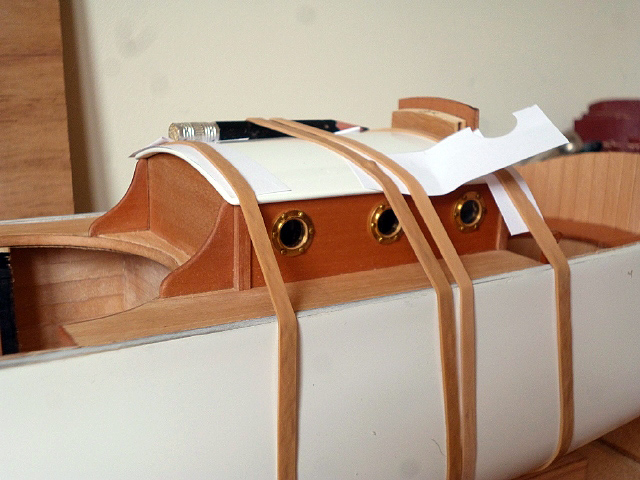
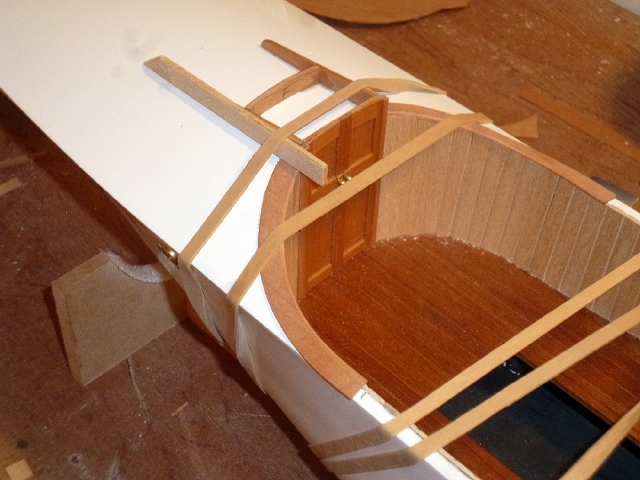
Finish
the roof in the same way as the hull until a perfect white sheen is obtained,
then glue it onto the real cabin. The photo shows it
being held in position with rubber bands while the glue dries. Paper is
used to prevent any chance of the rubber bands marking the new paint. Glue the eight brass stanchions in place, ensuring the holes align up perfectly, and add thin brass rod for the handrails. The hatch runners are made from 2mm pear sheet and glued in place onto the foredeck and cabin roof. The hatch roofs are 1mm pear sheet. Drill two holes in each to take the handles, then steam them to the required curve and glued them onto the tops of the runners and doors. The handles are made from brass wire and tiny brass washers. |
|
|
COAMING The coaming comprises four approximate quarter circles and four straight sections of 1mm pear sheet. The quarter circles are one of the trickiest parts of the model to make and fit. You can't trace them from the plan because the curve changes the dimensions. I made cardboard templates, sketching out and fashioning them by trial and error. You may find that minor inaccuracies have crept into your model meaning that each quarter template has to be made individually. Establish the inner curves first, allowing 1mm inside the vertical planking. The outer edge runs parallel and overlaps the side of the boat by a further 1mm. When you're satisfied that the four templates are correct, transfer them to 1mm pear sheet. Because these coaming sections will be fitted onto curved decks, I found it easiest if the grain runs fore and aft. Make the fitting easier by steaming them. You can't hold them in steam so use rubber bands to hold them onto a large can or other object that closely matches the curvature of the deck, keeping the grain fore and aft. Steam the assembly and allow to cool and dry before removing. When dry, remove the quarter circles and check how well they fit the model. You may need to add a twist where the ends meet the gunwales so they sit properly. When satisfied, sand them until the inner overhang is constant and the width parallel. To fit these sections I used UHU because it has more grip than PVA but allows slight movement.
|
 |
|
Now
cut and fit the four straight sections of coaming from 1mm pear sheet to fit
perfectly between the curved ends. They have a very slight curve you need to
allow for, especially the rear ones. Make notches to accommodate the rear
mooring posts.
Once the eight coaming sections are fitted, fashion the rubbing strake from 2x1mm pear strip, steam the ends to fit the curves of the hull and glue them in place. I used PVA; it's not very strong on the white surface but any excess can be wiped off, unlike UHU or superglue. |
 |
|
|