|
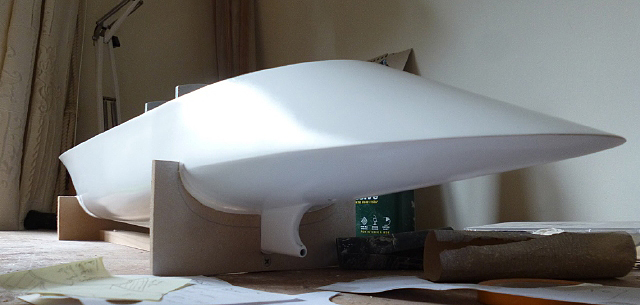
| Trim and sand the edges of the upper decks and refer to photographs of the finished model to make sure the hull shape is exactly the right. Note how the side profile of the hull changes from a curve to an angle, and pay special attention to the bow because it has concave sections. Here, wrap the sandpaper around a cylinder of a suitable diameter. It took me three sessions of filling and sanding before I was satisfied it was ready for paint. |  |
| For the first coat of paint I use white emulsion, applied by brush. It's thick enough to fill small gaps, dries quickly and is easy to sand. Once the hull is an even colour it's easier to see any inaccuracies and correct them. Don't be afraid to sand through to bare wood if necessary or to add filler. Sand and re-coat until you're satisfied the shape is as good as can be - this is about results not speed. |
 |
|
Cut out a keel
template from the plan, stick it onto 6mm thick wood and cut to shape.
Drill an accurate hole in the rear end which will be a snug fit for the
propeller shaft (brass rod) later.
|
 |
| You can also make the hole for the rudder post now. |
 |
| Glue the keel accurately to the underside of the hull and fill any gaps. While the hull is upside-down, drill a hole vertically into the keelson to take the bearing for the rudder post, leaving enough room for the propeller. |
 |
|
The rudder has the
same finish as the hull, so make it now so you can work on both at once.
The plans show a modern rudder for a radio-control model, but I chose to
make a more period shape. Cut it from 3mm wood sheet, sand it smooth and
glue it to a 4mm dowel. To act as a bearing in the hull I used a brass
cooling water outlet left over from a Billing Boats kit, but brass tube
would work too. Make sure the rudder post is a snug fit in the bearing,
but don't fit it yet. This photo is from the finished model because I forgot to take one during the build!
|
 |
|
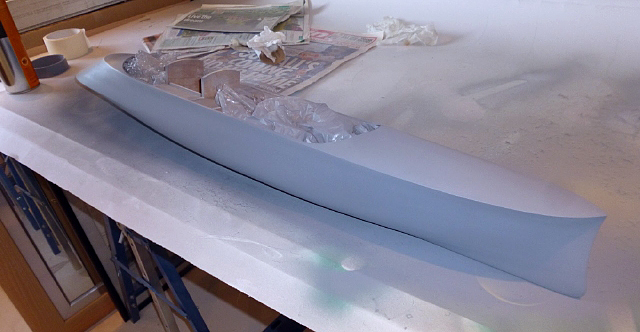
Aerosol primer. This
is the final stage to assess critically the hull shape. I used Tetrion
grey primer first as it seems to be the best for this, then Tetrion
white primer to act as an undercoat. Apply as many coats as you feel
necessary, being careful to avoid runs.
Even now I spotted a slight fault at the prow, and there was nothing for it but to sand down to bare wood and build it up again. |
|
|
FINAL FINISH This is critical to the success of the finished model, because what you do now will be fully visible. My first plan was to get the finish just with Tetrion gloss white aerosol, but this proved impossible because I couldn't cover all the areas in one go without overspray, underspray or runs. Masking off sections and doing it in stages would have left lines. The answer was to spray the hull in stages, not worrying about overspray, and then when fully dry, flatting back with wet/dry paper from 800 to 3000 so an even matt/satin finish was obtained. The secret final ingredient was car headlight polish – by happy chance this buffed the surface up to a lovely sheen. In hindsight a full gloss finish would have looked wrong; the satin sheen is a 'scale gloss' and looks excellent.
The extraordinary stern shape of Project X shows well here. The edge should be as sharp as you can get it, fading into a curve between F10 and F11. |

|
Carefully mark and drill holes for the forward portholes, taking great care not to mark or damage the new hull finish. I used a small drill and then enlarged the holes very carefully to final size with a Dremel and dental burrs. Fit the portholes with a smear of superglue and also the rudder bearing underneath. The hull is now complete! |
|